From your first sign-in to managing a listing. Choose your role, then find the task you need.
Buttons depend on your role, approval status and enabled services. This guide does not change your permissions. Screenshots show sample screens.
14 articles
No matching articles. Try a shorter phrase, choose another role, or contact support from your dashboard.
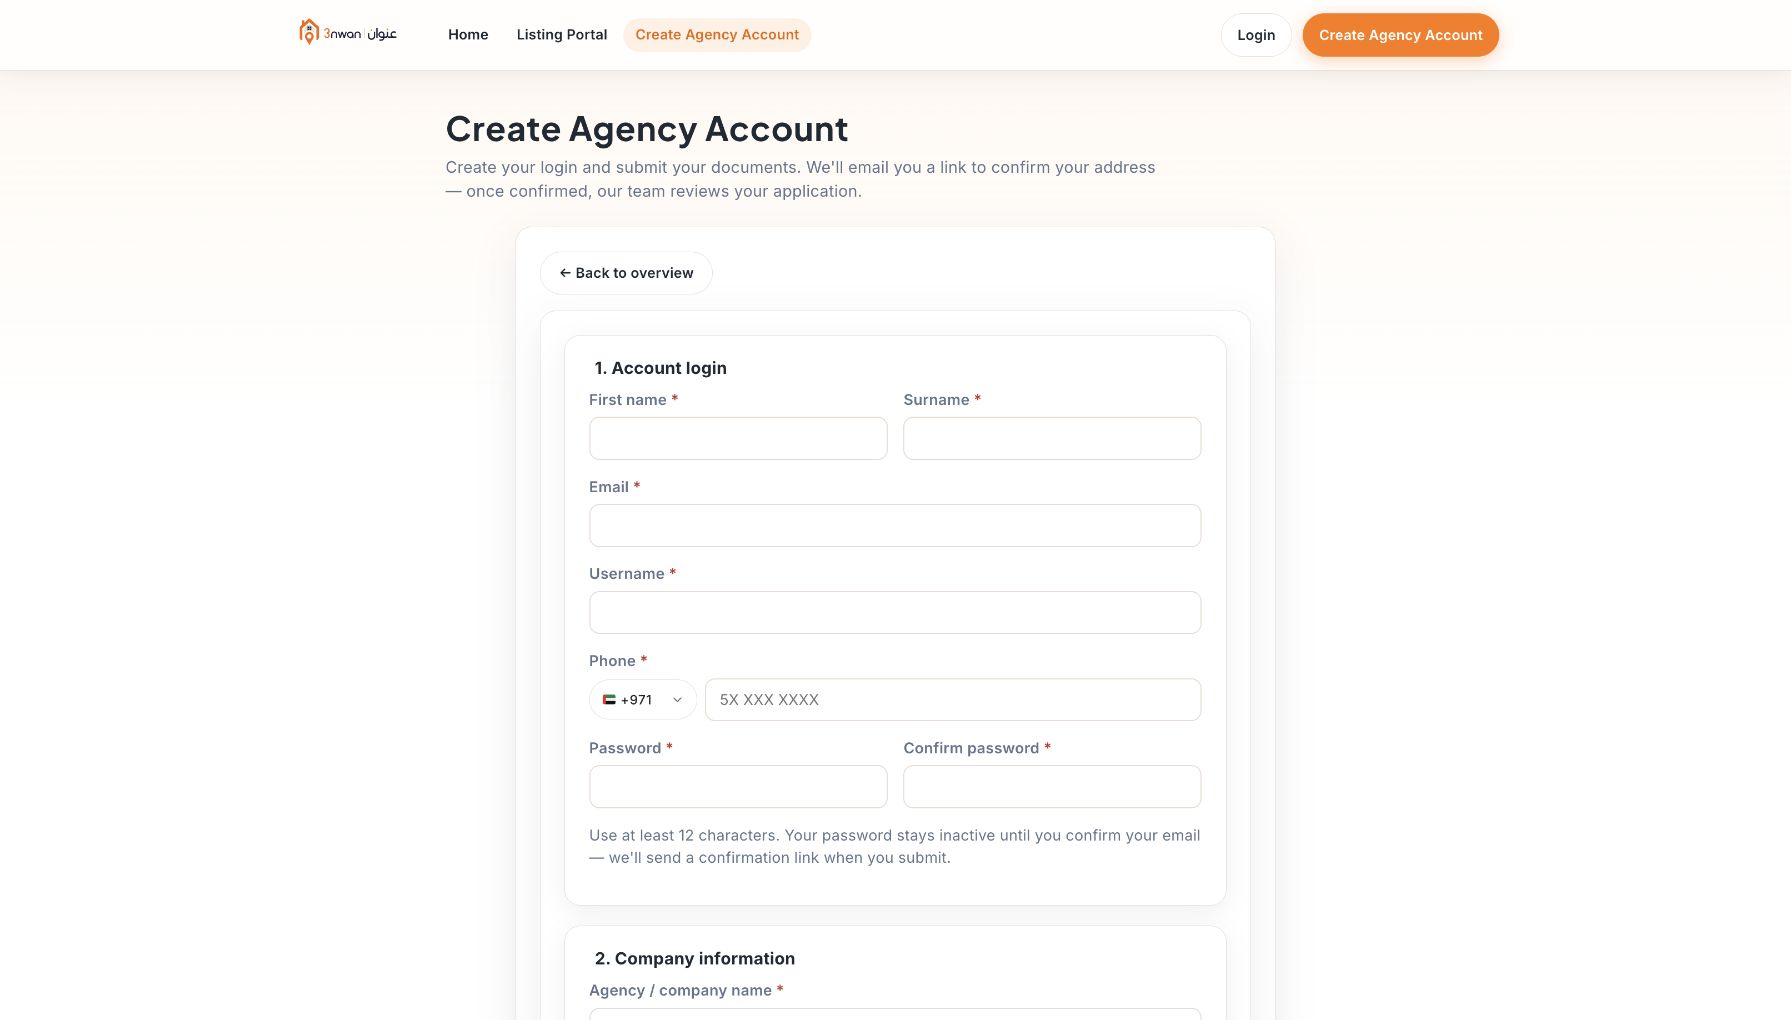
Create and verify your agency account
Register your business, confirm your email, and follow the review from your dashboard.
Open Create Agency Account. Enter the owner’s details, agency contacts, ORN and trade-licence information. Upload the required documents and check the expiry dates.
Review the application before its final submission. Read and accept the required declarations only when the information is correct and you are authorised to act for the agency.
Open the confirmation email and use its latest link. Sign in to track the application. Pending approval does not give permission to publish listings.
If the team requests changes, read the reason, correct the requested fields or documents, and resubmit from the application’s correction screen.
Some business and licence fields are locked while they are being verified. Use the requested correction workflow or Support; do not register a duplicate agency.
If an email link has expired, request a fresh one and use the most recent message. Check spam before retrying.
Example screen · select to enlarge. Buttons may differ by role and account status.Open this areaBack to top
Choose roles and invite your office team
Team / Staff is for office access. Brokers have a separate verification workflow.
Open Team / Staff and choose Add staff member. Enter the person’s own email and choose an available role.
Use Manager for day-to-day listing and broker management, or Billing user for the agency’s wallet and invoices. Only the owner can assign Manager access.
The invitee follows the email to set a password or accept the invitation for an existing account. Check the invitation status; resend from the team list if needed.
When a person leaves, use Remove access. Do not share the owner’s sign-in details with the team.
Owners have full agency control. Managers do not automatically gain payment or invoice-management rights. Billing users do not manage listings, brokers or the team.
An office role does not make someone a public broker. Each responsible broker needs an approved broker profile.
Manage verified public brokers under Brokers, not Team / Staff.
Open Brokers → Add broker. Enter the broker’s contact details, BRN and expiry information, then upload the profile photo, broker card and identity document requested by the form.
Submit for verification and follow the status in the broker list. Correct any requested information in that existing application instead of creating a second profile.
Follow the account-setup status and resend the setup invitation if needed. The broker uses their own credentials; approved agency access alone is not broker approval.
Before removing a broker, follow the reassignment or pause workflow for their listings. Reassign only to an approved broker in the same agency who has available slots.
If reassignment requests new owner-authorisation documents, upload them and obtain approval within the displayed deadline. A listing does not move to a different agency through reassignment.
Approval, restriction and suspension are different states. Read the actual status and reason before trying a listing action.
Create a listing for an approved responsible broker within your agency.
Open Add Listing and select the responsible broker. Check their available listing slots and the agency’s verification status.
Enter the purpose, property type, price, property details and structured location. Upload the final Title Deed and fill any details that could not be read automatically.
Add the private documents requested by the form, the required property photos and, when ready, the advertisement permit and permit number. Check the map and the cover photo.
Review every section and the declarations before saving. Read the result message and confirm the new listing appears in Listings with the expected status.
Only final Title Deeds are accepted in this workflow, not Oqood. A deed already used by an active listing is blocked; do not change its number to bypass the warning.
Private ownership and identity documents are not listing photos. Keep them in the document fields, never in the public gallery.
Use 5–30 property photos. Each new photo must be at least 1440 pixels wide and 900 pixels high.
Choose clear property images in JPG, PNG, WebP or HEIC/HEIF format, no larger than 25 MB per file. PDF is for document fields, not the photo gallery.
Wait for each upload to finish and check its thumbnail or document confirmation before saving the form. Choose the cover photo and check the gallery order.
For an upload error, follow the stated size or format requirement and retry that file. If the document result is uncertain, reload and check the saved document before replacing it again.
Existing smaller photos are retained and do not by themselves block an ordinary edit. The minimum applies to newly uploaded gallery photos.
The platform generates compressed WebP sizes for display, including smaller previews. Keep your original photographs in your own storage; the platform is not an archive of original files.
A draft is private to authorised professionals. Saving is not publishing.
If the advertisement permit is not ready, complete the required deed, location, photos and declarations and save the listing as a draft.
Return through Listings, open the draft and add the permit number and advertisement-permit file. Check all validation messages.
Use Submit for review or the displayed publish action. Verify that the status changes to a review state. Staff approval and publication checks still apply.
A private draft is not a public property page. Authorised agency managers and the responsible broker can work with it.
Do not treat an open form or uploaded file as a saved listing. Look for the save confirmation and reopen the listing to check it.
Use the original listing. Some changes require review before becoming public.
Open Listings, find the correct listing and choose Edit. Check its reference, title and photos before changing anything.
Change only what is needed, then save and read the result. Where critical-edit review applies, the proposed values wait for review while the approved version remains public, subject to other publication requirements.
Follow the pending-review or correction notice on that listing. If a change is rejected, read the reason and correct the existing listing rather than creating another.
A pending proposal is not yet the buyer-visible price or details. Recheck the saved result before submitting the same change again.
A compliance, availability or access block is separate from edit review. If the listing is offline, read its specific reason.
Keep availability accurate and close completed listings
The responsible broker reconfirms availability every 30 days. The agency owner or a manager can also confirm availability, or mark the property not available, for the agency’s listings. Monitor due dates from the agency listing list.
Check the listing’s last-confirmed date, next deadline and warning state. Make sure availability is confirmed before it becomes overdue.
The responsible broker confirms that the property is still available, its price is correct and the authorisation remains valid. Do not confirm an unavailable property.
For a property that is sold, rented or pulled back by the property owner, use Mark not available and the accurate reason. Check the listing’s resulting offline state.
Overdue confirmation can pause a listing. Confirmation alone cannot clear another publication block; resolve the stated problem too.
Completed or withdrawn listings are not permanent photo storage: photos are retired after the retention period. Qualifying suspensions continuing for 30 days can permanently delete the listing and its photos while retaining history.
Keep agency and broker documents current, and distinguish upload from approval.
Open Verification / Documents. Read the document type, expiry date, current status and the team’s instructions.
Upload the requested replacement in the matching field, enter the correct dates and submit it through the renewal or correction action shown.
Follow the review result. If changes are requested or the replacement is rejected, use the stated reason to correct and resubmit.
Uploading a file does not mean it is approved. An expired agency licence or ORN can prevent new publication. Expired agency or broker documents do not by themselves automatically hide existing listings; staff may take a separate action.
Listing permits have their own publication requirements. Do not assume that renewing an agency document also renews a listing permit. When a listing’s advertisement permit expires and no renewal is waiting for review, the listing goes offline automatically until a renewed permit is approved, and a listing left suspended for 30 days can be deleted.
Enquiries are customer contacts. Reports are concerns about a listing that need review.
Open Enquiries and filter by status, listing, broker, channel or date. Open the matching enquiry and contact the buyer using the available details.
Update the enquiry status as work progresses. A Call, Email or WhatsApp click records interest; it does not prove that a conversation took place.
Open Reports separately. Correct the issue, explain what you changed and choose Mark as addressed. The platform team reviews your response and closes the report.
Reporter contact details are not disclosed. Marking a report addressed is a request for review, not an automatic resolution or republication.
Use Statistics to compare engagement over the same period.
Open Statistics and select the date range. Choose the listing or broker view and narrow the results when needed.
Review views, favourites, enquiries and contact clicks as separate measures. Open a listing’s detail breakdown rather than comparing unrelated periods.
Use the enquiry list to follow up real customer contacts. If a figure looks wrong, note the listing reference and selected dates when contacting Support.
Engagement counts are not completed sales, unique buyers or guaranteed leads. The broker view is scoped to that broker; the agency view is scoped to your agency.
During the free launch period nothing is charged and paid promotions are not offered; this article describes how credits and billing work once payments open. Promotion credits and broker subscription charges are separate.
Open Wallet / Billing. Read available credits separately from reserved credits. Use the prices and fees currently shown, not a previous screenshot.
If Buy credits or Manage subscription billing is available to your role, follow the displayed card-payment flow. If payments are disabled or free launch is shown, do not expect a checkout.
Open Invoices, use its filters and page controls, then view, print or download an invoice. Check the finance email so invoices reach the correct recipient.
Owners and Billing users have billing access. A Manager may see the wallet balance without invoice or payment access. A broker does not receive the agency’s billing permissions.
A suspended broker can still occupy a billable seat until removed. Read your current plan and billing status; an estimated total is not proof that a payment was collected.
During the free launch period nothing is charged and paid promotions are not offered; this article describes how paid promotions work once payments open. Promotions belong to the agency and listing. Availability depends on the listing and the enabled packages.
Open Promotions. Select an eligible listing or review a broker’s request. Read the package, cost, duration and any start-date options before confirming.
Approve or decline requests only within your role. Follow the resulting status: an agency approval may still require platform review before activation.
For Price Reduced, first save a genuine price reduction and follow the eligibility/request action shown. It is not a credit top-up or a paid substitute for a price change.
Do not assume that changing brokers, hiding a listing or ending an enquiry automatically refunds an active promotion. Contact Support about a suspected staff error.
A promotion does not bypass verification, permit or availability requirements, and does not guarantee enquiries or a sale.
Use the profile menu for account details and Support for a problem you cannot resolve.
Open the profile menu. Use your personal profile for your own details and the agency profile for editable business contacts.
For a login-email change, confirm the link sent to the new address. Your current sign-in email stays active until confirmation. Finance email is a separate setting.
If an action is locked, check the agency status and your role. If an email or password link expired, request a new one from the sign-in flow.
Open Support, choose the relevant topic and describe the steps, exact message and listing reference. The reply goes to the email on your account.
Never include your password, card details or a password-reset link in a support message. For an uncertain save, reopen the record before submitting it again.